
UV Mapping in 3ds Max
INTRO TO TEXTURING
One of the most important skills needed in the creation of 3d models for games is the skill to texture the model because texture adds color and details to 3d models; keeps polygon count low.
Texturing is not usually just a simple matter of creating a model and throwing it into Photoshop and hope it looks good.
There are two types of texture groups that define object’s surface in different ways. The two types of texture groups are:
Image based textures:
Shaders:

A shader is a series of layered colors that can be defined as basic material.
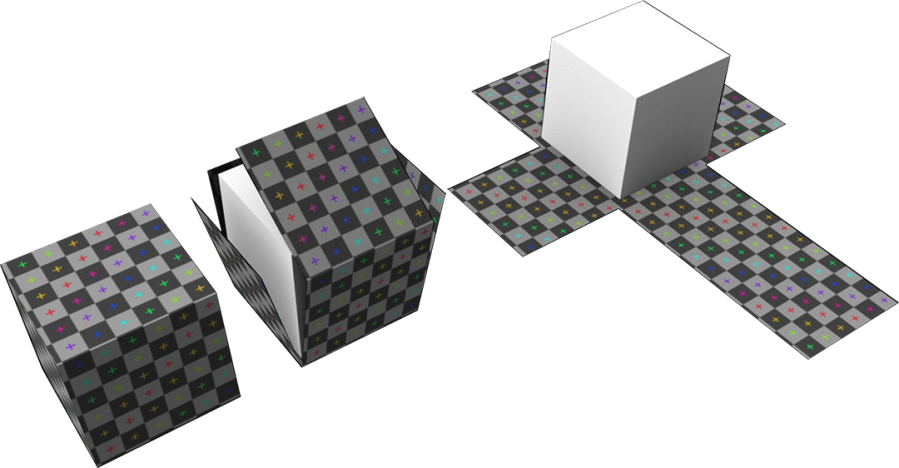
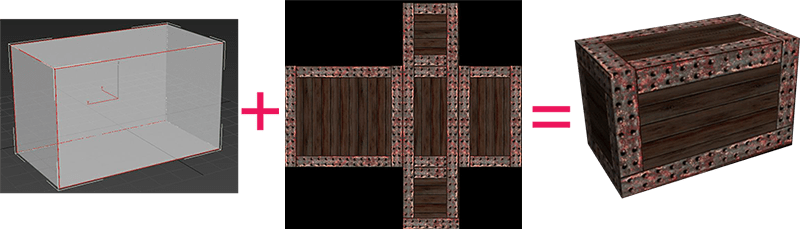
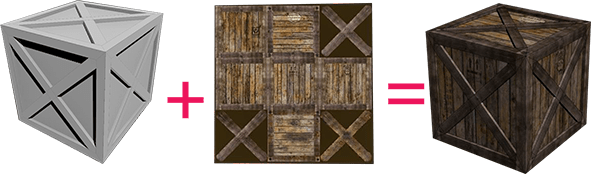
To see any texture on a model, it must be applied as a UV map; you will need to use a process called unwrapping.
This process takes an image, flattens it out, and then properly wraps or covers the model so that there are no seams in the image connection.Programs such as Photoshop, Painter, and Paint Shop Pro are used to paint details to UV maps.
Before UV unwrapping After UV unwrapping

Most common Maps used:
 |
Diffuse Color Map– to assign a pattern or texture to a material. Opacity Map-to make an object partially transparent;
|
|---|---|
|
Bump Map -( gray scale) which makes an object appear to have a bumpy or irregular surface. Normal Map-(3 color)a way of adding high-resolution detail to low-polygon objects. It is especially useful for real-time display devices such as game engines. |
Beginner UV Mapping in 3ds Max Tutorial-PDF: uv-mapping-in-3ds-max-tutorial
Unwrap UVW
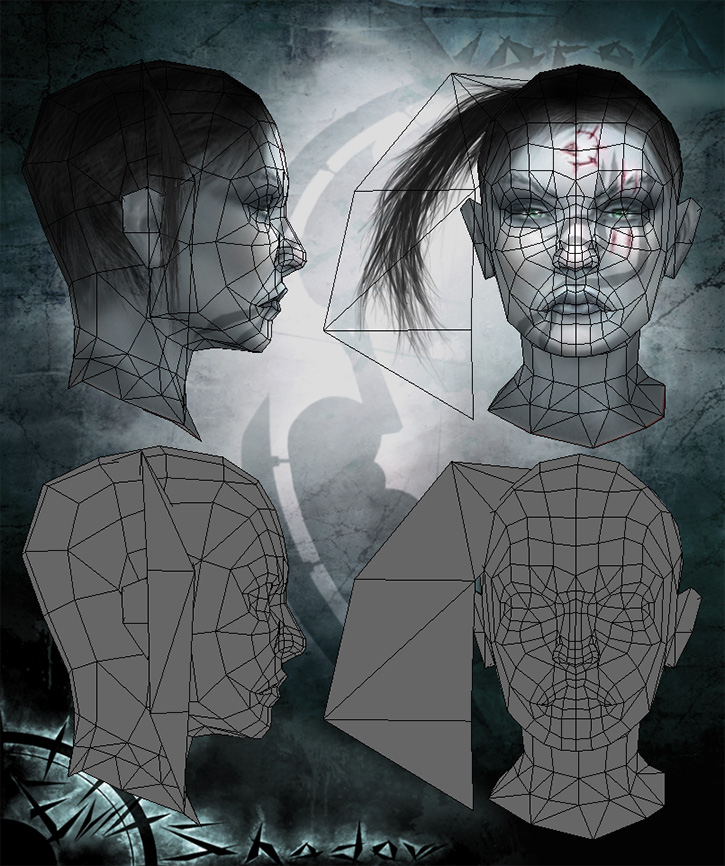
(game character)
When you Unwrap UVW for your character in 3d studio max or any other program, you will need to apply same techniques as plastic surgeon or seamstress do; you will need to hide seams.
When you cut UV’s on character clothes and you are not sure where to cut, check your own clothes and see location of the seams.
When you cut UV’s on character organic parts and you are not sure where to cut, watch some videos about plastic surgeries, example: to hide facelift scars, surgeon cuts behind the hairline.
 http://alexjames4.blogspot.kr
Transparency Map
hair, fur, eyelashes and other elements
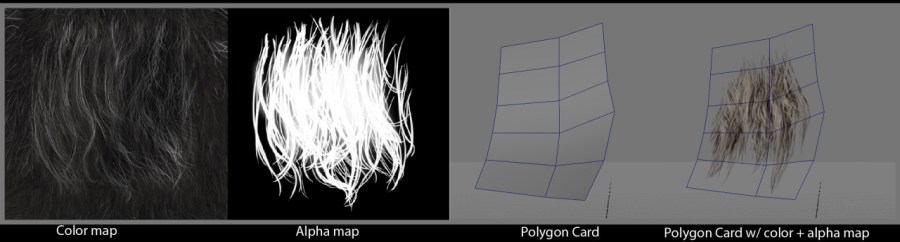
There are many ways to create hair for game character but in order to keep low polygonal count use transparency map. First use polygonal planes to create desired hair style; look for inspiration in fashion magazines, online or on the street. Next unwrap each plane and export to Photoshop to create color/ diffuse map and transparency map; Normal map or displacement map can create more believable looking hair.
 http://www.paultosca.com/varga_hair.html

Chibi character UV mapping and Texturing
