
Important hotkeys:
Maximize/Minimize Viewport: Click on desired Viewport -Alt + W
Rotate Viewport: MMB + Alt
Move Viewport: hold MMB or MMB+W
Biped System
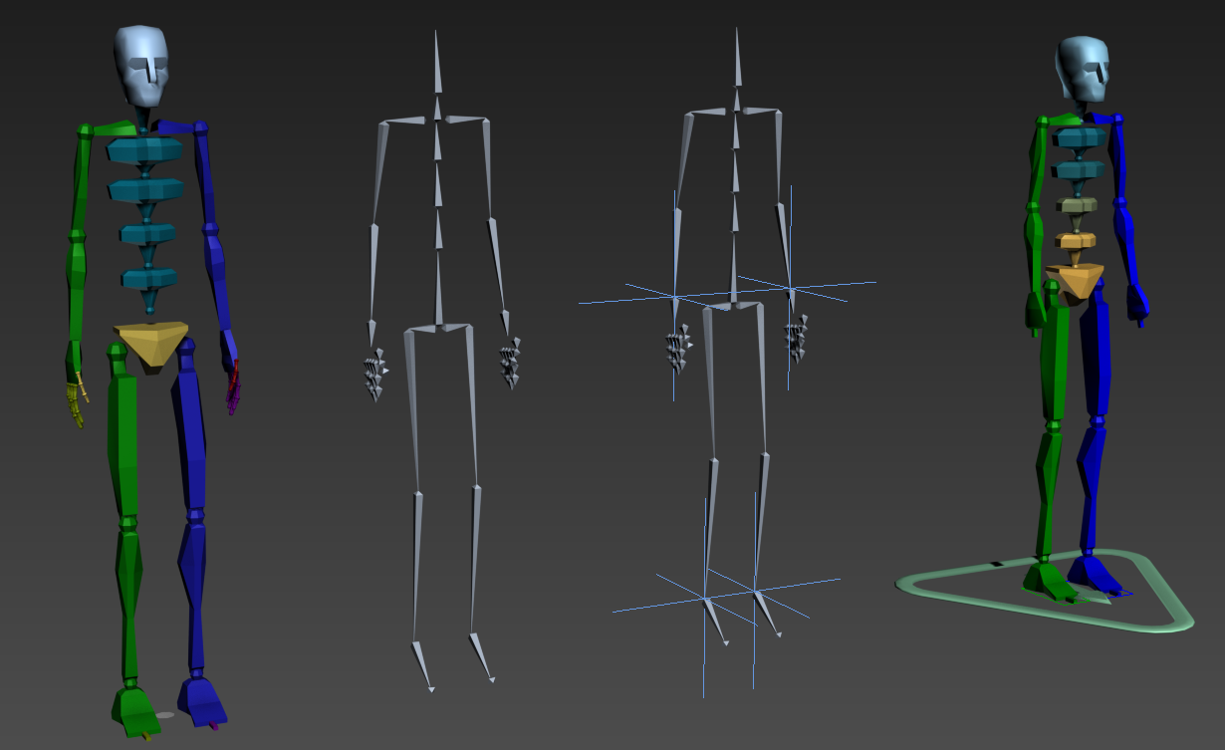
The biped skeleton created with the Biped module is a two-legged figure created as a linked hierarchy, and designed for animation. The biped skeleton has special properties that make it instantly ready to animate.
Create => Systems => Biped

You can create a biped by clicking Biped button and then dragging in the active viewport: define the height of the biped as you move the cursor.
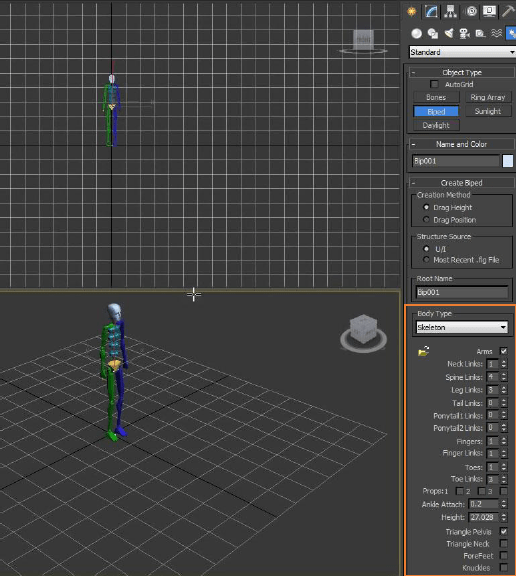
During biped creation, you can change any of the default settings : Arms, Neck Links, Spine Links, and so on, are for a human figure.
Body Type group
The drop-down list in the Body Type group lets you choose the biped’s overall look:
- Skeleton A realistic skeleton that fits naturally into a character mesh.
- Male A silhouette mold based on basic male proportions.
- Female A silhouette mold based on basic female proportions.
- Classic The biped object from the original version of character studio.
Figure Mode
You can change biped structure and fit that structure to a character mesh.
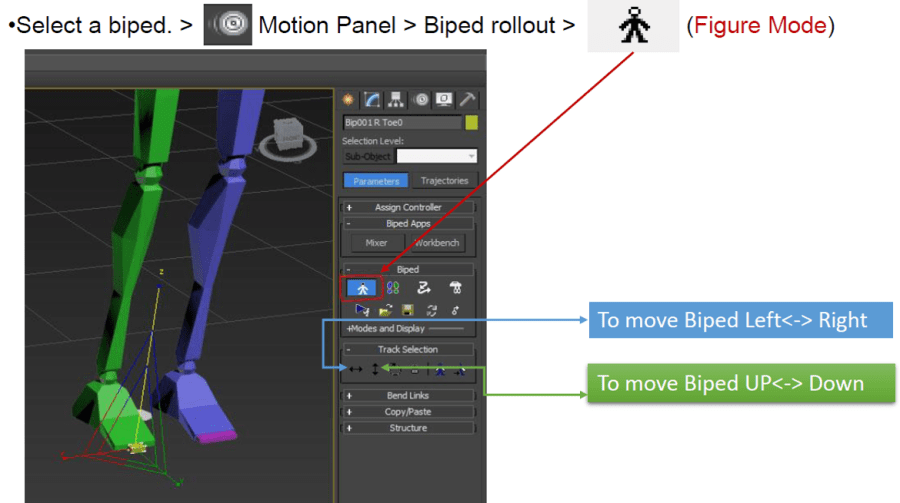
When in figure mode you can change STRUCTURE, any of the default settings : Arms, Neck Links, Spine Links, and so on, are for a human figure.
Copy/Paste
- Select any part of the biped whose posture you want to copy; example: left toe
- On the Copy/Paste rollout, click (Create Collection) and rename it if desired.
- Click (Copy Posture).
- Select opposite side of the biped; example: right toe.
- Click (Paste Posture) or (Paste Posture Opposite- if you wan parts to be symmetrical).
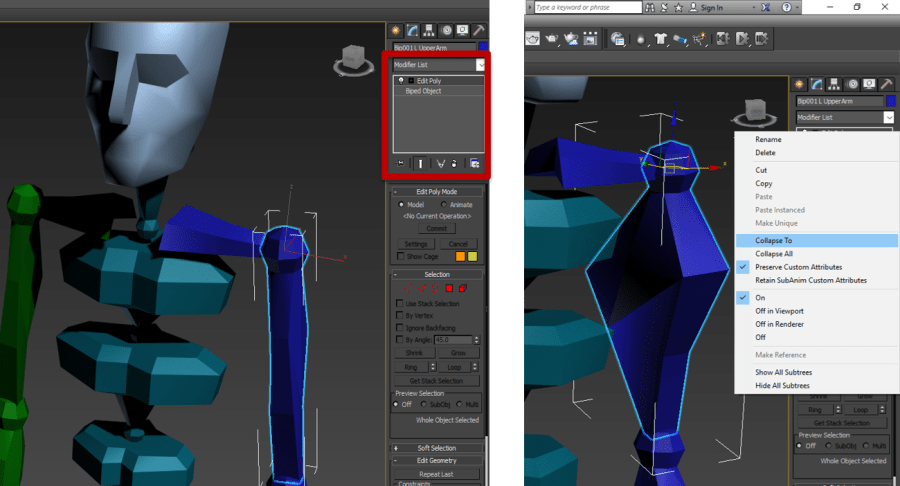
You can edit biped mesh by applying Edit Poly modifier from Modifier List; remember to collapse Edit Poly modifier after you finish making changes to biped mesh, otherwise it will be visible after you export it to game engine.
_________________________________________________________________
Bones System
A Bones system is a jointed, hierarchical linkage of bone objects that can be used to animate other objects or hierarchies.
Note: A basic bones system is a hierarchical “chain” of bones, connected end to end, which you create with one command.
On the ![]() Create panel, click
Create panel, click ![]() (Systems). On the Object Type rollout, click the Bones button.
(Systems). On the Object Type rollout, click the Bones button.
Click anywhere in a viewport to start a bone; use reference or do draw on top of your character.
01
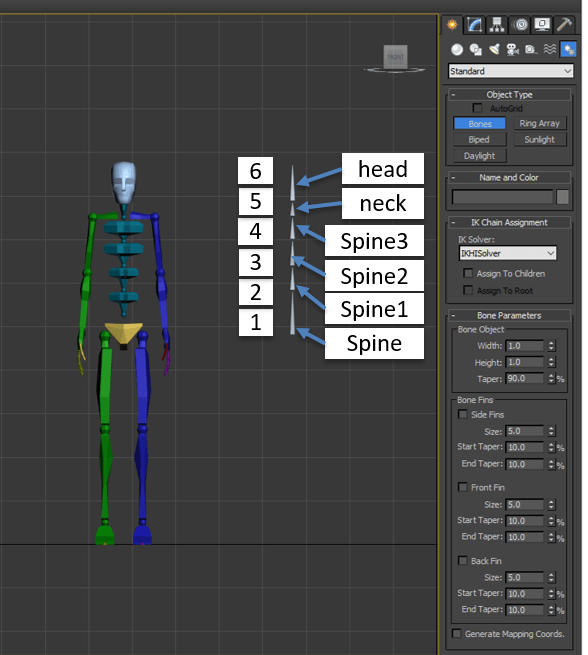
02
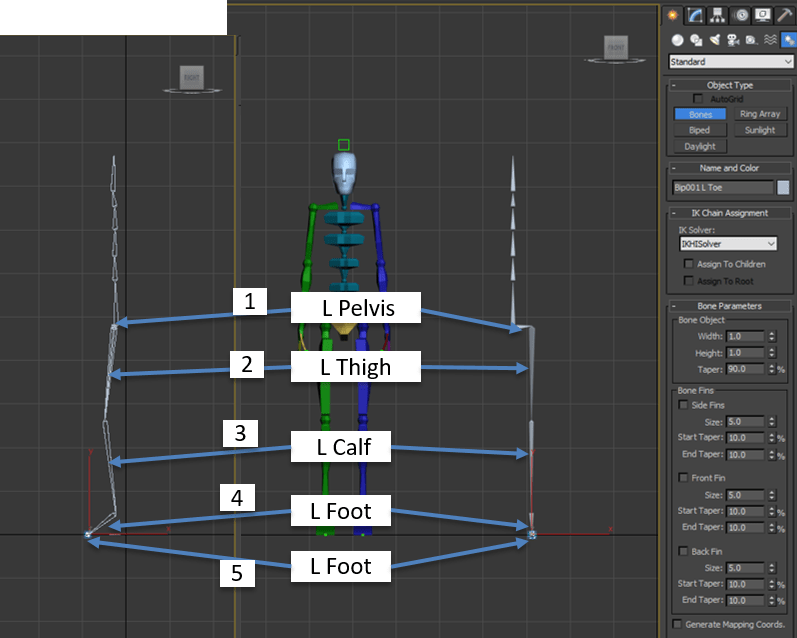
03
04

05 Linking bones
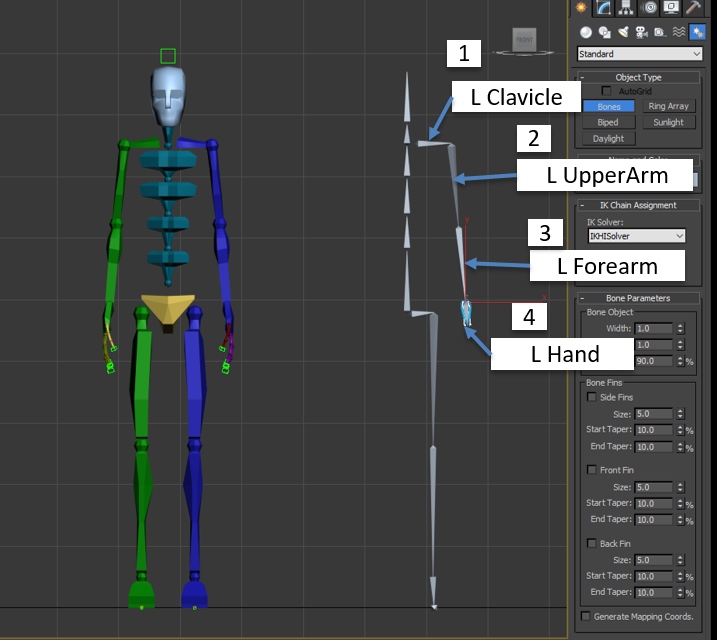
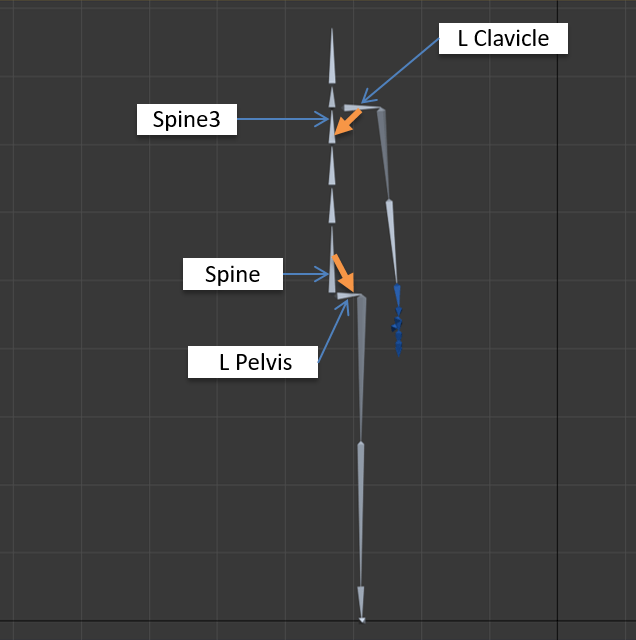
![]() The general process of creating links is to build the hierarchy from child to parent.
The general process of creating links is to build the hierarchy from child to parent.
- Main Toolbar >
 (Select And Link)
 - Drag a line from an object (the child) to any other object (the parent).

06
Link Clavicle to Spine3 and Spine to L Pelvis
07
Copy and Mirror bones
Controls on the Bone Editing Tools rollout let you create and modify bone geometry and structure, and set bone color for one or more bones.
- .
 08
08

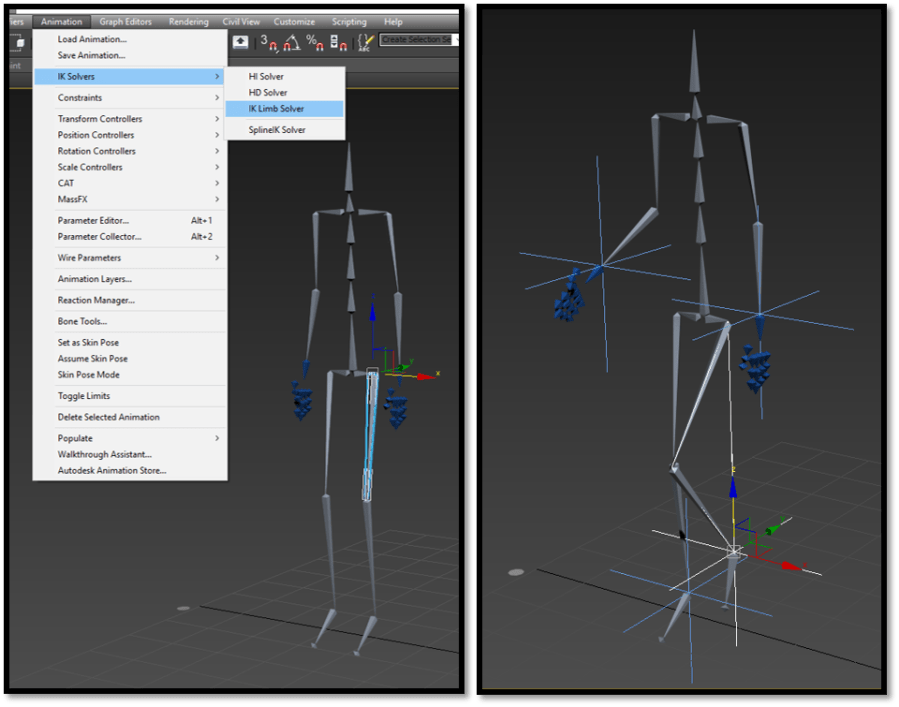
09 IK Solvers
Rename Bones on Right Side. Also we can add IK Solvers to make animation easier.
HI (History-Independent) Solver
I will use IK Limb solver that operates on only two bones in a chain; can animate the arms and legs of a character.
The IK Limb solver can be used for export to game engines.
_________________________________________________________________
CAT (Character Animation Toolkit)
CAT (Character Animation Toolkit) is a character-animation plug-in for 3ds Max. The CATRig is the hierarchy that defines the CAT skeletal animation system. The flexibility of the CATRig character rig is the result of keeping the structure as generic as possible.
To load a CATRig preset:
- Open the
 Create panel and click
  (Helpers).
 - Open the drop-down list at the top of the panel and choose CAT Objects.
- Click the CATParent button.
- Choose a preset rig from the list on the CATRig Load Save rollout.
- Click or drag in the viewport to add the preset to the scene.

To create a CATRig from scratch: LINK
- Open the Create panel and click (Helpers).
- Open the drop-down list at the top of the panel and choose CAT Objects.
- Click the CATParent button.
- In the list on the CATRig Load Save rollout, make sure is highlighted, and then drag in the Perspective or Top viewport to add the CATParent object.

- With the CATParent selected go to the Modify Panel.
- At the bottom of the CATRig Load Save rollout, click Create Pelvis.
The pelvis appears in the viewport, centered over the CATParent.

 Select the pelvis.
The pelvis is an example of a hub, and when you select it, the Hub Setup rollout appears on the Modify panel. From this rollout you can add legs, arms, spines, tails, extra bones, and additional rigging objects (props, spare parts, and so on). For more information about the Hub Setup parameters, see Hubs
- On the Hub Setup rollout, click Add Leg twice.
Two legs are added on opposite sides of the pelvis.

- Click Add Spine.
A spine, consisting of a number of bones and another hub, appears on top of the pelvis. In effect, the second hub is a ribcage.

- Select the hub at the top of the spine and click Add Arm twice.
Arms are added to either side of the ribcage.

- Click Add Spine.
A new spine and a third hub appear atop the ribcage. This third hub can act as a head.
 Move the head hub downward and slightly forward, to produce a more human-like structure.

You now have a basic CATRig. All of the example cATRigs were created using variations of this method, so you can see that it’s possible to create a vast variety of CATRigs with a few basic tools.
__________________________________________________________________
– Download Sample File Here (Max 2016): Biped, Bones, CATRig
